Leaves in Amber Beanie Pattern by Christie Wareham-Norfolk
Leaves in Amber Beanie Pattern by Christie Wareham-Norfolk
44 in stock
Couldn't load pickup availability
- Local pick up available
- Please contact us for information.
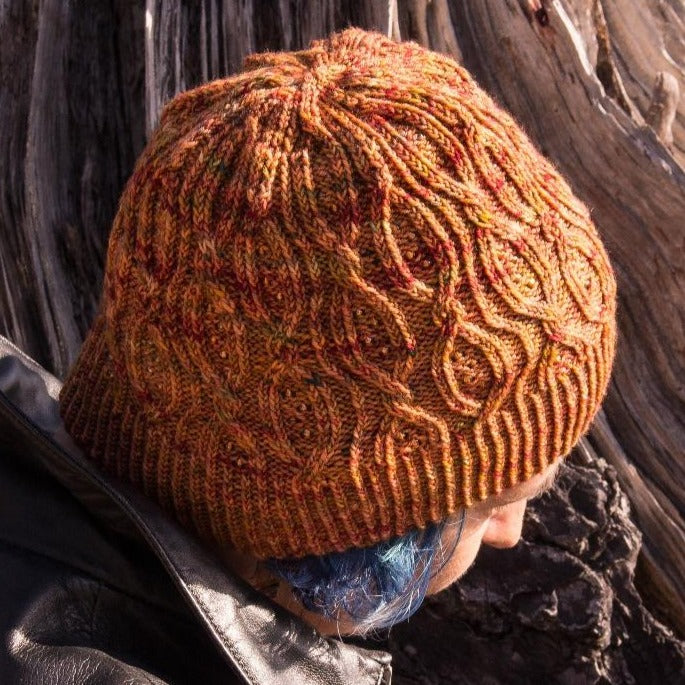
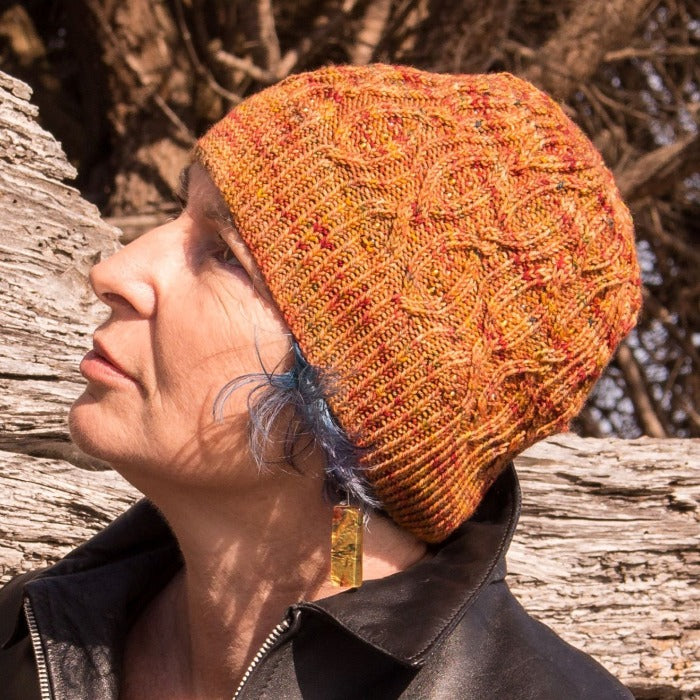
Leaves in Amber is another popular beanie design by Christie Wareham-Norfolk and is a digital Download from Knittymag.com
Or you can download it from here by adding it to the checkout and you will then receive a download link.
Christie used my Supreme Sock yarn in Amber Fleck to knit this pattern but I think lots of my lovely colourways would suit this gorgeous lacey pattern.
My Supreme Sock Yarns can be found here
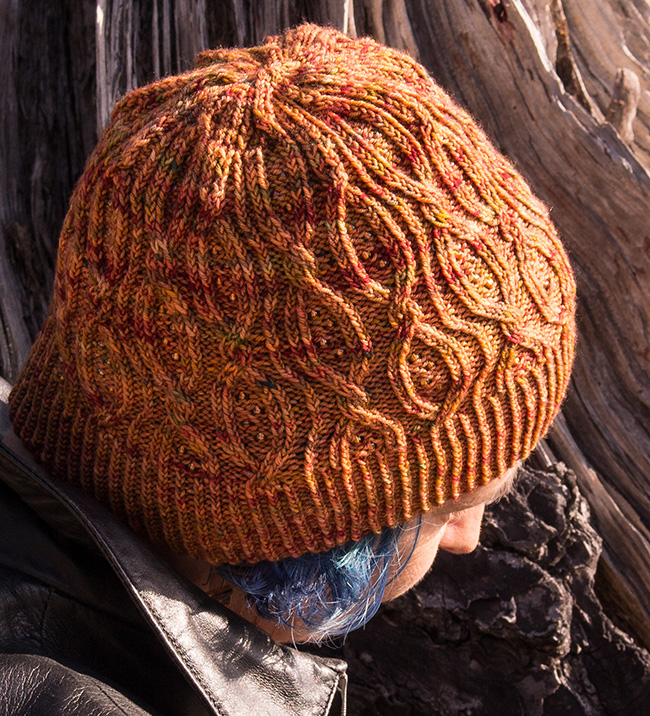
Who can resist the changing colors of leaves in Autumn as they turn from green through reds and ambers to gold?
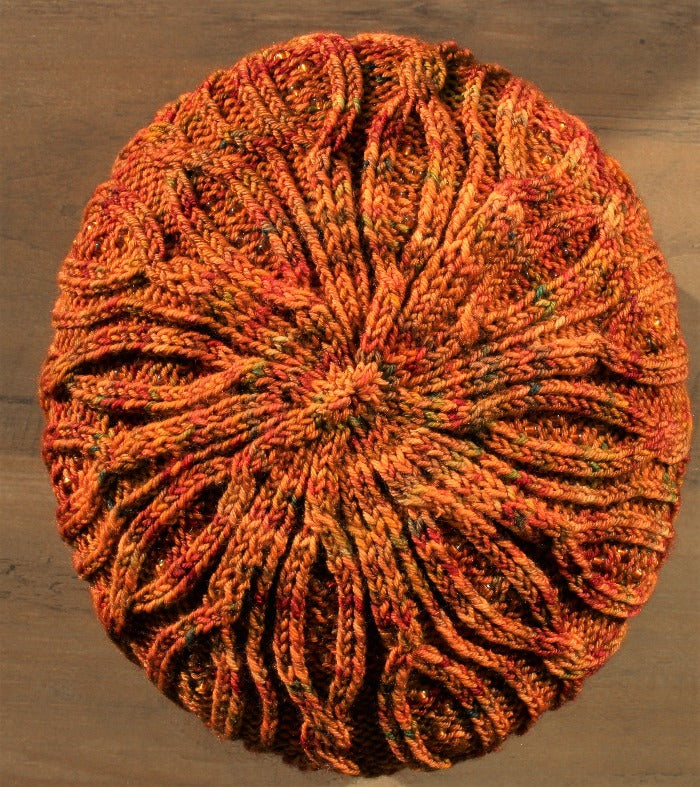
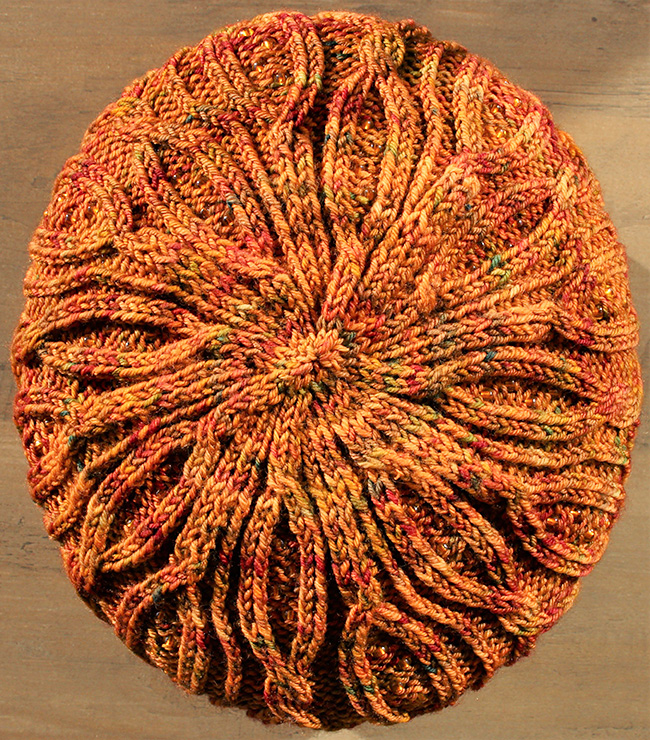
Golden beads highlight the leaves on this cabled hat, and the crown decreases are positioned to continue the beading pattern across the head.
The hat will look just as good without the beads so can be customised to suit personal preferences.
 model: Christie WN
 photos: Kit WN
SIZE
Adult S[M, L]
FINISHED MEASUREMENTS
Brim circumference: 16[18, 20] inches/ 40.5[45.5, 51] cm unstretched. Stretches to fit head circumference 21[23, 25] inches/ 53.5[58.5, 63.5] cm
Depth: 9[9.75, 10.5] inches/ 23[25, 26.5] cm
MATERIALS
Yarn![]() Sally Ridgway 4 ply Supreme Sock [85% Australian Merino, 15% Nylon; 437yd/400m per 100g skein]; color: Amber Fleck; 1 skein; approximately 200[250, 300] yds/ 185[230, 275] m
Sally Ridgway 4 ply Supreme Sock [85% Australian Merino, 15% Nylon; 437yd/400m per 100g skein]; color: Amber Fleck; 1 skein; approximately 200[250, 300] yds/ 185[230, 275] m
Yarn Characteristics:
The sample shown uses a merino/nylon fingering weight yarn. For substitution, a wool or wool/nylon mix yarn of a similar weight should work well. Solid, semi-solid or tonally variegated yarns are recommended for this pattern. Avoid highly variegated or speckled yarns. The cabled pattern will be more pronounced in lighter-colored yarns. Beads can be subtly matching or high contrast as preferred.
Recommended needle size
[always use a needle size that gives you the gauge listed below - every knitter's gauge is unique]![]() 1 set US #2.5/3mm traditional or flexible DPNs, 1 long circular or 2 short circulars as you prefer, for crown decreases
1 set US #2.5/3mm traditional or flexible DPNs, 1 long circular or 2 short circulars as you prefer, for crown decreases![]() US #2.5/3mm 16 inch/40 cm circular needle
US #2.5/3mm 16 inch/40 cm circular needle
Notions![]() Miyuki (or other glass beads) size 6/0 beads; color; Pearlised Lt Amber/Copper; 144[180, 240] beads/approx. 10[12, 16] g
Miyuki (or other glass beads) size 6/0 beads; color; Pearlised Lt Amber/Copper; 144[180, 240] beads/approx. 10[12, 16] g![]() 0.6mm Crochet hook for attaching beads
0.6mm Crochet hook for attaching beads![]() stitch markers
stitch markers![]() yarn needle
yarn needle
GAUGE
32 sts/38 rounds = 4 inches/10 cm in stockinette stitch
40 sts/33 rounds = 4 inches/10cm in pattern, unstretched
PATTERN NOTES
[Knitty's list of standard abbreviations and techniques can be found here.]
Beads are placed on the sts marked before they are worked. To do this, slip the crochet hook through the bead then through the stitch on the left needle that is to be beaded. Lift the stitch off the needle and pull it carefully through the hole in the bead. Slip the stitch back onto the left needle; the bead sits under the needle. Purl the stitch as usual, with the tip of the right needle going through the stitch where the yarn sits above the bead. We have a photo tutorial here.
CHARTS
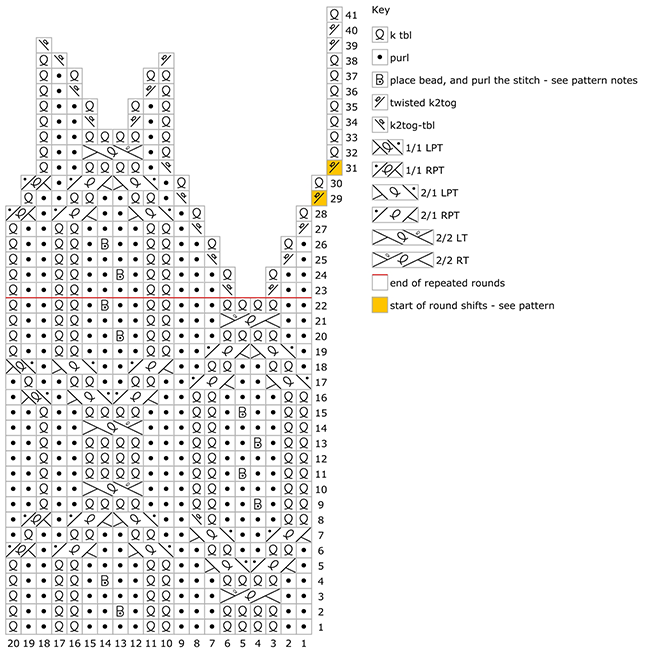
2/2 LT: Slip 2 sts to cable needle and hold to front; k2 tbl, then k2 tbl from cable needle
2/2 RT: Slip 2 sts to cable needle and hold to back; k2 tbl, then k2 tbl from cable needle
2/1 LPT: Slip 2 sts to cable needle and hold to front; p1, then k2 tbl from cable needle
2/1 RPT: Slip 1 st to cable needle and hold to back; k2 tbl, then p1 from cable needle
1/1 LPT: Slip 1 st to cable needle and hold to front; p1, then k1 tbl from cable needle
1/1 RPT: Slip 1 st to cable needle and hold to back; k1 tbl, then p1 from cable needle
Twisted k2tog: Sl 1 st purlwise, sl a second st by inserting right needle from back to front through the back leg of the st – twisting it the other way. Return both sts to left needle and k them tog.
DIRECTIONS
Band
Using the cable cast on or your preferred stretchy method, CO 160[180, 200] sts. Place marker and join for working in the round.
Ribbing Round: [P1, k1tbl] around.
Work Ribbing Round for 2.2[2.75, 3.25] inches, 6[7, 8] cm
Body of Hat
Next round, establish chart: Starting with Chart Round 1[16, 9] , work Chart 8[9, 10] times around.
Work until you've completed Round 22, and then work Rounds 1-22 1[2, 2] more times. Continue until you have completed Round 28.
After the last stitch of Round 28 is worked, remove the marker, and return the last st worked to the left needle. Replace the marker – this is the new start of round.
Work Rounds 29 and 30, and then shift the start of the round again, as before: remove the marker, and return the last st worked to the left needle; replace the marker – this is the new start of round.
Continue as set until Round 41 is complete. 8[9, 10] sts rem.
Break yarn and draw through remaining sts. Pull tight, then draw yarn through sts again to secure.
FINISHING
Block by soaking the hat thoroughly in warm water. Gently squeeze out the excess water. Either lay flat to dry after a gentle shaping, or place hat over an upturned bowl of approx. the right size. Weave in ends.
ABOUT THE DESIGNER
 Christie recently moved from tropical North West Western Australia to Tasmania where she is enjoying the opportunity to wear her hand knits in the cooler climate.
Trained as a Chartered Management Accountant, Christie took up knitting as a productive outlet due to chronic illnesses that resulted in spending a lot of time sitting or lying down. She also crochets, weaves, makes bobbin lace, does dressmaking, cross stitch and kumihimo braiding and has been known to dive into any textile-based rabbit hole that crosses her path. Christie describes her patterns as classic with a quirky twist.
Find Christie on Ravelry and Instagram.
Pattern & images © 2021 Christie WN
